Saturday, 2 August 2014

Time Passes

A year after Mental Block returned to the UK, I'm starting to explore ideas for what the next project might look like. I dug out a bit of code that I hadn't touched since 2012 to draw a Penrose tiling (the kite-and-dart tiling, specifically) and tidied it up a bit, thinking it might be interesting to make a jigsaw puzzle whose pieces form that tiling. But first I hacked it a bit to produce a Facebook cover picture:
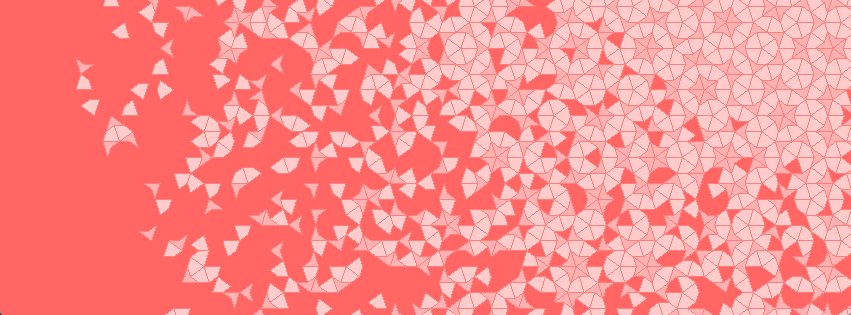

(The method for producing the decaying effect here is mildly interesting. I wanted it to be probabilistic but deterministic. My answer was to hash each tile's position and map the hash onto the [0-1] interval; if the result is greater than the probability density at that point then the tile is not drawn. This could equally have been achieved using a pseudo-random number generator, but it has the nice property of being a pure function of the tile, so no state needs to be carried around – a particular advantage when writing in a pure functional language.)

As for the jigsaw puzzle, I had begun to have my doubts about its suitability for a Nowhere-style project. One of the things that kept people coming back to Mental Block was that it's open-ended and doesn't have a right answer. The best things that people built with it were the ones which I had never imagined and that didn't seem possible:


Similarly, at Nowhere in 2014, one of the best things was the noticeboard:


Again, this is something with no finished state. Consequently, it was rewritten hundreds of times over the course of the event.

A jigsaw puzzle, by contrast, would probably be solved once and then left alone. How can it be given a sense of restlessness and open-endedness? One way would be to paint a different design on each side, so that if one side is finished then the other isn't. But that's still only two possibilities, and doesn't leave much room for anyone else's imagination.

What if the puzzle is circular, and its two sides link up with each other like a Möbius strip? Then, if you start assembling the bottom left of it, you will find a mismatch once you work your way across to the top right. Turning a nearby piece over, you find that one of its faces matches the discontinuity in one direction, and its other face matches the discontinuity in the other direction. As you turn more pieces over, you push the mismatch somewhere else but you can never eliminate it.

Simplifying from a jigsaw puzzle to an array of 60 sectors, this idea becomes a clock. Each sector has two faces; one face matches its clockwise neighbour and the other matches its anticlockwise neighbour. There's always a mismatch, and that's how you tell the time. Here's a rough draft of that idea, built from a 24 hour time lapse video of Barcelona:


The idea works best at the top where night and day are obviously different, and worst at the bottom where the dawn light and the dusk light aren't much different from each other.

I also experimented with a simple square grid, warped so that the discontinuity is evident in the angle of the squares:


At certain angles this is hard to read. That can be helped by modulating the hue. If each full revolution on the clock covers half the colour wheel, then the discontinuity will always show complementary colours and will be very easy to see:


The next step is obviously to relieve the tedium of squares with the help of Mr. Escher's work:


I'm not sure where this is going, now. Any thoughts?

Monday, 5 August 2013

Mental Block: A Summary

Mental Block is an interactive work of art that I (George van den Driessche) designed and built for Nowhere 2013. Its seven pieces can be assembled into a 1.2m cube, or into a multitude of other shapes. There are ten large square images hidden in the work; each can be revealed by building a cube in a different way. The seven pieces are also a good size for sitting on!


The full photo album from the event is here.

Timeline

The project was carried out in my spare time. Overall, it involved about six months of programming, planning and modelling, followed by three months of construction.

  • October: Discovered the Soma cube. Wrote a computer program to enumerate its solutions.

  • November: Improved program performance and rewrote it in other languages to see how it came out.
  • January: Added code to export a 3D animation of the solutions to Blender. Uploaded a simple animation to YouTube.

  • February: Used a constraint solver to discover that a single Soma cube can contain ten whole square faces (though obviously they can't all be displayed at once).
  • March: Realised I could build a giant Soma cube and paint it. Submitted an application for an art grant for Nowhere.
  • April: Learned that my art grant application was successful. Acquired plywood, and built a small test cube to learn how to build the full thing.
  • May: Experimented with feet and corners for the cube. Cut all the large parts of plywood. Made some more models in Blender and uploaded a Sketchfab model of one of them.


  • June: Built all of the pieces of the giant cube. Undercoated them all, and designed a way to project images vertically from a laptop, for painting the sides.
  • July: Finished painting and varnishing the cube. Took it to Nowhere and finally assembled it. Brought it back from Nowhere.


Materials

  • 21msq 9mm spruce plywood
  • 32m 34mm frame timber
  • 2000 1.25" countersunk woodscrews
  • 500 rubber flight case feet
  • 500 1.25" round-headed screws
  • 2.5l white undercoat
  • 2.5l floor varnish
  • Various acrylic paints

Things that worked well


  • Modelling the more complicated pieces in Blender gave me confidence that I could build the structure correctly.
  • I structured the work so that if I ran out of time, I'd still have something I could present.
  • The pieces were as weatherproof as they needed to be.
  • The pieces have not suffered too much damage, even though I decided not to add corner protectors.
  • Using a spreadsheet to manage my cut lists meant I used the frame timber with over 98% efficiency.
  • I kept good financial records.

Things that didn't work so well


  • I didn't have time to fit EL wire edges to the pieces.
  • The tarpaulin that was supposed to protect the work from storms was instead ripped up by the storms.
  • The lights I'd ordered didn't arrive on time, so I had to pick up some more expensive equivalents at short notice.
  • I made one mistake in the painting of the sides.

Things learned (and relearned)


  • Timber merchants don't know how much their timber weighs, because their customers almost never care.
  • How to use a mitre saw, a skill saw, and a jigsaw.
  • What IP65 means.
  • How to wire Ceeform plugs.
  • Having a system is much more important than having the best system.
  • Power tools are amazing.
  • People like to build tall things, and will go to great lengths to build the tallest things they can.
  • Friends will happily lend a hand when the need arises.


Saturday, 27 July 2013

Done and Heavily Dusted

It worked! The moment of truth was when we put all the painted and varnished pieces together, and put all the feet on. They stacked just fine.


It was possible to build a complete face of the cube before we'd finished putting all the pieces together, so of course the first thing to do was to show that it was safe to stand on the result.


Over the course of the week, people did use the cube in all the ways I had hoped they would. They solved the cube to reveal the different designs (the smiley face being very popular). They used the pieces as seats. And they built unlikely edifices that I had never imagined.


The woodwork lasted the whole week with only small amounts of damage, despite my decision not to bother protecting the corners. And the paint and varnish also survived well. The tarpaulin that was supposed to protect the work from weather was torn apart on Wednesday night in the first thunderstorm, but that just showed that the tarpaulin wasn't necessary.

I found I'd only made one mistake, which was annoying but not enormously important: I had painted one side of one of the seven pieces upside down. The side formed part of the Nowhere logo, which meant that it wasn't possible to make a cube with that logo on the side. (It was still possible to complete the logo, but the pieces didn't then form a cube.) The other nine faces worked perfectly.
More photos are in a Google+ photo album and a Facebook photo album – whichever you prefer.

I can just about remember the beginning of this year, when this project was nothing more than a vague intention. It would never have become a reality without the help of a great many people in various ways. So, here are the people who made it happen:

Construction crew: "Freddie" (Mike), Bianca
Power tools training: "Freddie" (Mike)
Painting and varnishing: Lexy, Charlotte, Tom and Kate, Vic
Transport: my parents
Moral support: the Nowhere art crew (especially Camille); other nobodies (including Lexy, Bill, Rich, Joyce, Bambi, Hilda, Pauly, Nancy); my family; my Google ex-team (John, Natalie, Kyle)
Maths: the members of the Google math mailing list
Emergency tools: Pauly
Emergency beer: Asierr
Funding: everyone who bought a Nowhere ticket

You're all amazing. Thank you!

Tuesday, 25 June 2013

Build Complete; Painting ...

 Last week, as expected, I finished building the last of the pieces of the giant Soma cube. (I'd predicted a Thursday finish, but it turned out to be Friday. Not too bad, though.)
Piece Y was fun to build because, in spite of being made of square shapes, it has rotational symmetry of order three around a diagonal axis. For the same reason, it has a good strong corner shape from which to reckon right-angles. I took a little longer over it than I had planned because I wanted to do it justice, and it did come out very nice and square.
So this is what all the sides of all the pieces look like. There are ... quite a lot of them!

On Sunday I bought a handful of paints to experiment with colours and textures. I confirmed that undercoat/primer is definitely going to be worthwhile, as is a quick sanding once that's applied.

Yesterday I sorted the convex sides into the ten cube faces to which they belong, ready for painting. I also bought enough undercoat for the entire job. Mike very kindly did the first layer of undercoat, and took only 90 minutes, which was encouraging.

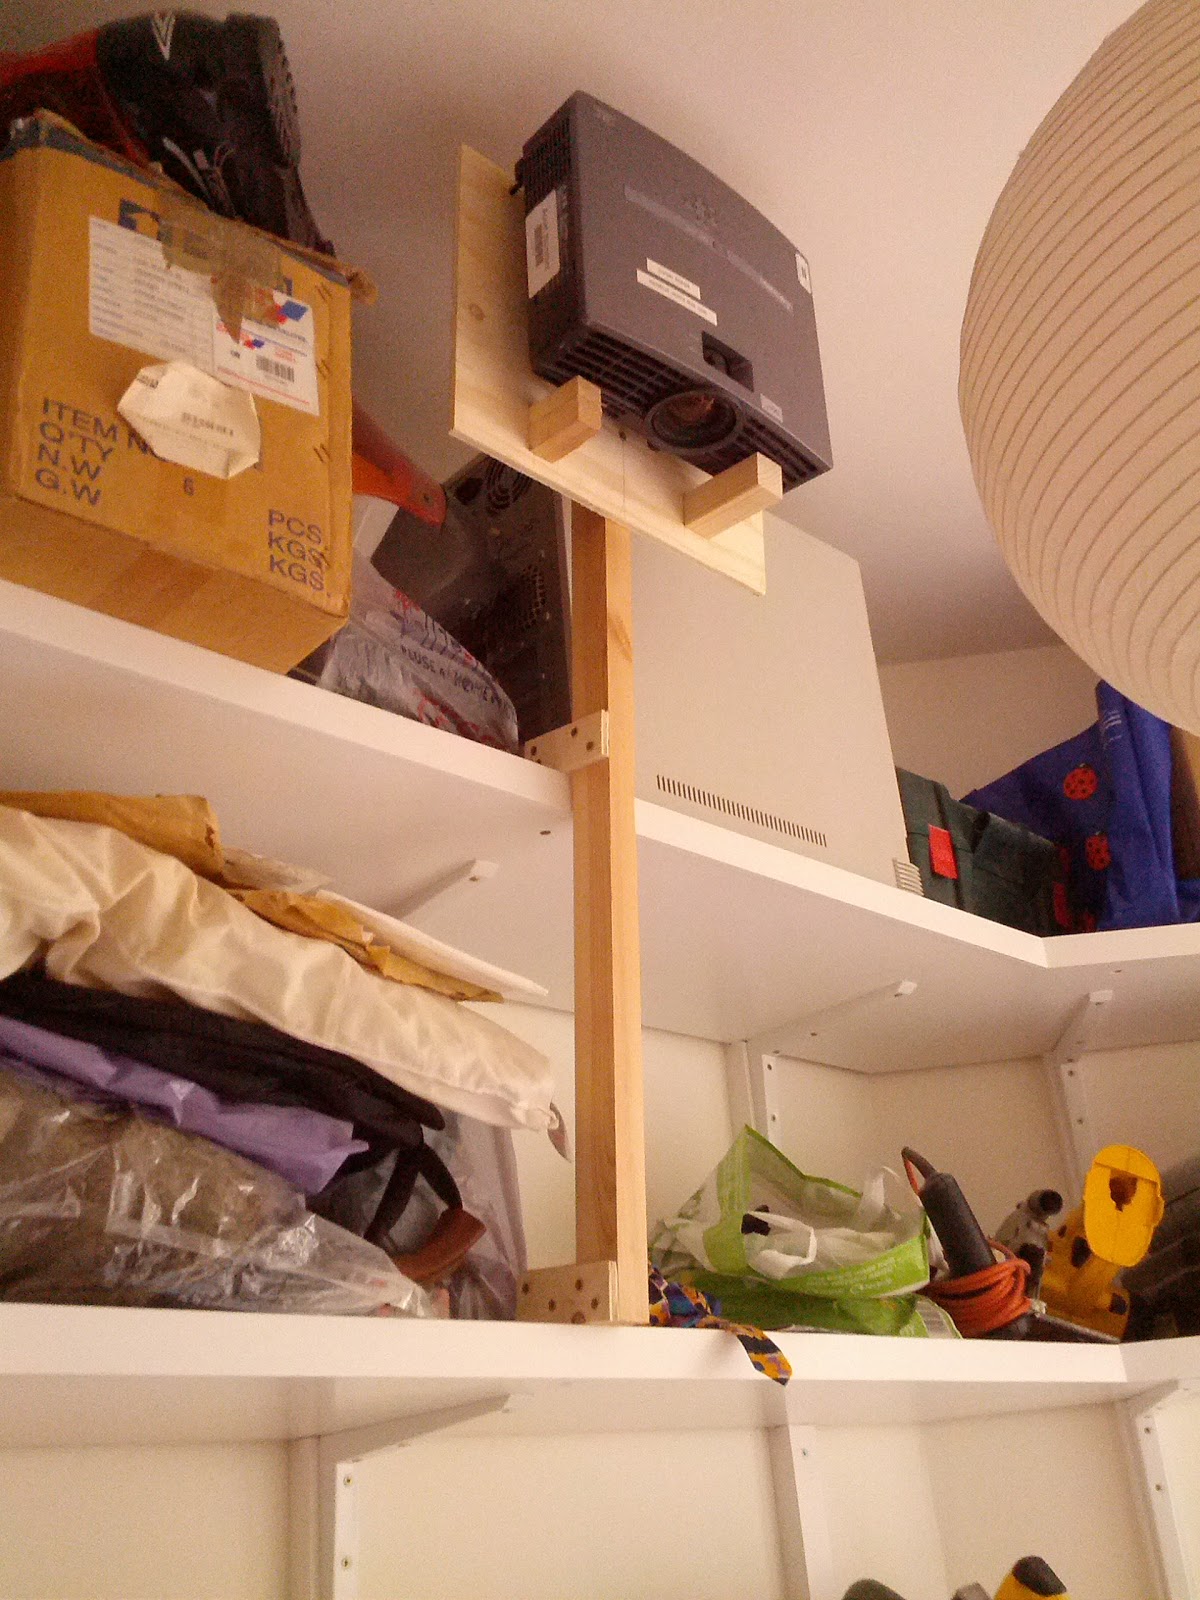
The last thing I did on Monday was to cobble together a crude frame for holding a projector vertically at ceiling height. The shelves have holes in them, that were originally going to accommodate rods supporting the lowest shelves. Those rods turned out not to be necessary, but the holes have found a new purpose: the frame is held on by just two dowel pins that fit into those holes.

With the projector pointing downwards from a height of over 2.5 metres, I can lay out each cube face on the floor and project its design onto it, which should make it easy to produce large-scale imagery. The frame took under an hour to build, and should save many times that. 
Today all the convex faces got a gentle sanding and then their second undercoat. Here they are, drying. I realised that if I put a screw part-way into a carefully chosen screw-hole on each face then that could be used to prop the faces a good distance apart.

Also I finished rigging the projector with power and signal. Amazingly, from ceiling height it produces an image on the floor that's 1.22m tall – exactly the size it needs to be. So that's one advantage of living in a place with high ceilings.

Monday, 17 June 2013

Still Building

A week after my last post, I've finished four out of seven pieces of giant Soma cube, and am half-way through the fifth. The first four were all comparatively simple: because they are essentially flat shapes, I could attach most of the frame to the two large sides, then join it all together with simple rectangles. The fifth (piece P) is more complicated. There's no obvious order in which to put it together, and it needs screws at some less accessible angles.
 To cap it all, this piece is more likely than others to suffer odd tension forces, so I decided to put a long coach bolt through the central joint. Working out how to dril the hole for that accurately enough was a novel task.
Once I'd finished assembling piece P, I put cube X on it to get an idea of how the pieces will look when fitted together. I'm happy with the result. As you can see, the pieces are built slightly smaller than the ideal mathematical cubes that they represent, leaving a gap that is just large enough for the feet that will eventually be on every side.

After I've finished gluing piece P together, the next piece will be Q which is the mirror image of P. And then after that, only Y will be left. I've been timing my work with a stopwatch app, and I reckon there are about 20 hours of construction work left. So the basic construction should be complete by Thursday.


Sunday, 9 June 2013

Under Construction

Piece R in progress
I've started building proper cube pieces. It's taking a lot of measuring, double-checking, and Pythagoras' theorem to make sure the pieces don't end up too warped. I suppose the process would be less laborious if I had been able to cut the faces and frames to higher precision.

Roughly speaking, the steps to build each piece are:
  • Collect all the parts required.
  • For each length of frame:
    • Clamp it onto the side to which it will be glued.
    • Drill pilot holes for all the screws it will need.
    • Secure it temporarily with just two screws.
  • Fit the faces together, and add more pilot holes and again secure with two more screws on each edge. This is the step where the alignment of the holes can be fine tuned, to help keep the faces flat.
  • Number the faces on the inside, and also mark which other faces they are adjacent to, for easy reassembly on site.
  • Drill pilot holes for all the feet.
  • Remove the second set of temporary screws.
  • For each side:
    • Label the corners with letters on the inside, and label the ends of the frame with the same corner letters.
    • Remove the first set of temporary screws, to release all the lengths of frame.
    • Countersink all the pilot holes.
    • For each length of frame:
      • Glue it onto the side, and secure it permanently with all the screws it will need.
Preliminary construction of piece S
I weighed piece S after assembling it. It is 16.7kg, which is about what I was expecting. One person can lift it, but it would definitely be more fun for two people.

Gluing the frame onto one side
Meanwhile, I did a bit more work on the maths. I found that, by adding variables that model how much of each solution face appears on the outside of each solution, I can use the same integer constraint solver as before to discover a set of ten solution faces where solving for one face doesn't nearly reconstruct any of the other faces. This required 360,000 constraints and I wasn't sure the solver would be able to deal with that. But it turned up an answer in only 30 seconds ... in spite of being single-threaded.

Back in the physical world, I still need to work out how to varnish and paint the thing. The wood is very absorbent, so it could probably use a coat of varnish before painting with acrylic or similar.

If you've got any recommendations, let me know.

Ready for decoration


Tuesday, 14 May 2013

I need your help

Okay, lovely people, it's time to think about painting, and I need your input.

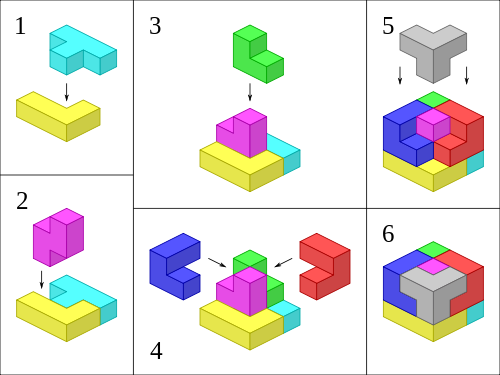
As you perhaps know, I'm building a giant Soma cube to take to Nowhere in July. There are 240 different ways to put its seven pieces together to form a cube.

And I've discovered (by using mathematics!) that though a cube, of course, has six faces, it is possible to choose one complete square face from each of ten different solutions of the cube such that none of the ten chosen square faces share any of the faces of the pieces that compose them.

In other words, if you gave me ten different square pictures, I could carefully paint the pieces of the cube so that, if you solved the cube one way, you'd get one of the pictures, and if you solved it another way, you'd get a different picture, and so on. The cube would secretly have ten faces!

So I want you to help me choose ten different square pictures, so I can decorate the cube like that. Here's the spec:

Themes

One face will be reserved for a Nowhere logo. The other nine designs are to reflect different aspects of life that conflict with each other or compete for attention ... something like:

  1. Family
  2. Friends
  3. Work
  4. Rest
  5. Travel
  6. Home
  7. Your topic here!
  8. Your topic here!
  9. Your topic here!

Style

Each design should be bold and simple. That way, it will be easy to see even in dusty conditions. Also it will mean even a software engineer can understand it. Think icons, traffic signs, special symbols in typefaces (♥¸ ☺, &, ☢, ♜, ⚥) and so on.

 The finished cube will be 1.2 metres on a side, but there will be some narrow gaps between the pieces. Each face is made of nine smaller square faces. Ideally, each design should cover all nine of the smaller squares that compose it.

What you should do next

  • Open the face template that shows, in proportion, how one square face will be made up. Print out a few copies and put them on your desk or wherever. See what you can fill them with. Maybe doodle on them when you're on the phone or bored. Photograph or scan the results, and share them with the +Soma Cube, or send them to nowherecube@gmail.com.
  • Think about the things in your life that you wish would add up, but which don't. Do you love the sunshine, but know that only one rainy city will ever be truly home to you? Do you love burning things, but worry about your carbon footprint? Share your thoughts with the +Soma Cube or send them to nowherecube@gmail.com.
What's in it for you, beyond fame and glory? Something, I promise ... but I'm not saying what yet.