Monday, 17 June 2013

Still Building

A week after my last post, I've finished four out of seven pieces of giant Soma cube, and am half-way through the fifth. The first four were all comparatively simple: because they are essentially flat shapes, I could attach most of the frame to the two large sides, then join it all together with simple rectangles. The fifth (piece P) is more complicated. There's no obvious order in which to put it together, and it needs screws at some less accessible angles.
 To cap it all, this piece is more likely than others to suffer odd tension forces, so I decided to put a long coach bolt through the central joint. Working out how to dril the hole for that accurately enough was a novel task.
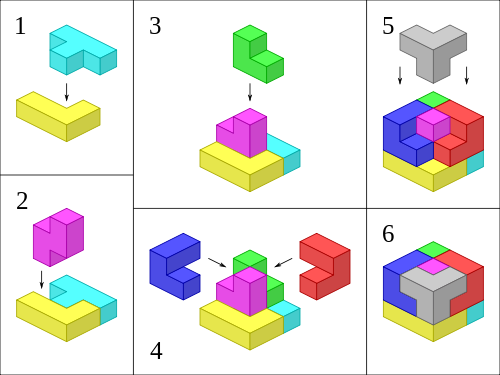
Once I'd finished assembling piece P, I put cube X on it to get an idea of how the pieces will look when fitted together. I'm happy with the result. As you can see, the pieces are built slightly smaller than the ideal mathematical cubes that they represent, leaving a gap that is just large enough for the feet that will eventually be on every side.

After I've finished gluing piece P together, the next piece will be Q which is the mirror image of P. And then after that, only Y will be left. I've been timing my work with a stopwatch app, and I reckon there are about 20 hours of construction work left. So the basic construction should be complete by Thursday.


Sunday, 9 June 2013

Under Construction

Piece R in progress
I've started building proper cube pieces. It's taking a lot of measuring, double-checking, and Pythagoras' theorem to make sure the pieces don't end up too warped. I suppose the process would be less laborious if I had been able to cut the faces and frames to higher precision.

Roughly speaking, the steps to build each piece are:
  • Collect all the parts required.
  • For each length of frame:
    • Clamp it onto the side to which it will be glued.
    • Drill pilot holes for all the screws it will need.
    • Secure it temporarily with just two screws.
  • Fit the faces together, and add more pilot holes and again secure with two more screws on each edge. This is the step where the alignment of the holes can be fine tuned, to help keep the faces flat.
  • Number the faces on the inside, and also mark which other faces they are adjacent to, for easy reassembly on site.
  • Drill pilot holes for all the feet.
  • Remove the second set of temporary screws.
  • For each side:
    • Label the corners with letters on the inside, and label the ends of the frame with the same corner letters.
    • Remove the first set of temporary screws, to release all the lengths of frame.
    • Countersink all the pilot holes.
    • For each length of frame:
      • Glue it onto the side, and secure it permanently with all the screws it will need.
Preliminary construction of piece S
I weighed piece S after assembling it. It is 16.7kg, which is about what I was expecting. One person can lift it, but it would definitely be more fun for two people.

Gluing the frame onto one side
Meanwhile, I did a bit more work on the maths. I found that, by adding variables that model how much of each solution face appears on the outside of each solution, I can use the same integer constraint solver as before to discover a set of ten solution faces where solving for one face doesn't nearly reconstruct any of the other faces. This required 360,000 constraints and I wasn't sure the solver would be able to deal with that. But it turned up an answer in only 30 seconds ... in spite of being single-threaded.

Back in the physical world, I still need to work out how to varnish and paint the thing. The wood is very absorbent, so it could probably use a coat of varnish before painting with acrylic or similar.

If you've got any recommendations, let me know.

Ready for decoration


Tuesday, 14 May 2013

I need your help

Okay, lovely people, it's time to think about painting, and I need your input.

As you perhaps know, I'm building a giant Soma cube to take to Nowhere in July. There are 240 different ways to put its seven pieces together to form a cube.

And I've discovered (by using mathematics!) that though a cube, of course, has six faces, it is possible to choose one complete square face from each of ten different solutions of the cube such that none of the ten chosen square faces share any of the faces of the pieces that compose them.

In other words, if you gave me ten different square pictures, I could carefully paint the pieces of the cube so that, if you solved the cube one way, you'd get one of the pictures, and if you solved it another way, you'd get a different picture, and so on. The cube would secretly have ten faces!

So I want you to help me choose ten different square pictures, so I can decorate the cube like that. Here's the spec:

Themes

One face will be reserved for a Nowhere logo. The other nine designs are to reflect different aspects of life that conflict with each other or compete for attention ... something like:

  1. Family
  2. Friends
  3. Work
  4. Rest
  5. Travel
  6. Home
  7. Your topic here!
  8. Your topic here!
  9. Your topic here!

Style

Each design should be bold and simple. That way, it will be easy to see even in dusty conditions. Also it will mean even a software engineer can understand it. Think icons, traffic signs, special symbols in typefaces (♥¸ ☺, &, ☢, ♜, ⚥) and so on.

 The finished cube will be 1.2 metres on a side, but there will be some narrow gaps between the pieces. Each face is made of nine smaller square faces. Ideally, each design should cover all nine of the smaller squares that compose it.

What you should do next

  • Open the face template that shows, in proportion, how one square face will be made up. Print out a few copies and put them on your desk or wherever. See what you can fill them with. Maybe doodle on them when you're on the phone or bored. Photograph or scan the results, and share them with the +Soma Cube, or send them to nowherecube@gmail.com.
  • Think about the things in your life that you wish would add up, but which don't. Do you love the sunshine, but know that only one rainy city will ever be truly home to you? Do you love burning things, but worry about your carbon footprint? Share your thoughts with the +Soma Cube or send them to nowherecube@gmail.com.
What's in it for you, beyond fame and glory? Something, I promise ... but I'm not saying what yet.


Monday, 13 May 2013

Making Faces

I spent most of the May Day bank holiday cutting cube piece faces. I've now finished all the large pieces, which also means I've finished all the difficult concave cuts.


I learned a couple of industrial economics facts from this.

The first is that, even on small-scale production of things such as the nine identical L-shaped faces I needed to make, it pays to specialise. That is to say, it's faster to do the first cut of all nine, then the second cut of all nine, and so on, than it is to do all the cuts of the first face, then all the cuts of the second face, and so on. That's because setting everything up for each kind of cut takes time, and doing different cuts one after another also makes me likely to forget where in the room I left the various tools.

The second thing I noticed is that, because working more efficiently allows me to do the same amount of work in a shorter time, it also means I'm doing more physical activity per unit time. So one symptom of increased productivity is more sweat. (In my normal line of work, the extra 'sweat' from increased efficiency is experienced by a data centre, so I don't notice it so much.)

I wasn't entirely sure that I'd get the cuts for the more complicated pieces right, so I made models of them in Blender. (I tried Sketchup first and found it fiddly and surprisingly buggy. Blender has been harder to figure out but I found it very slick once I discovered how to use snap-to-face.)

Here's one of my models on Sketchfab. Unfortunately that site doesn't do animation yet so you can't see how all the pieces are going to go together or what the inside looks like.

Now there are lots of boring square and squarish pieces left — 37 of them, to be precise. I can make it interesting by working out how to cut more than one of them at once without sacrificing precision.

Aside from that, I need to acquire and start cutting the wood for the frame. 34x34mm timber is readily available and will certainly be solid enough, but is a bit heavier than I'd like. I suspect I could get away with something slenderer than that, but I can't find anyone selling smaller square cross sections.

Thursday, 2 May 2013

Further Feet


Following on from my last foot-finding foray, I've done some more experiments. It's possible to cut a tennis ball in half in a zigzag sort of way, so that the halves each fit neatly on a cube corner. There are four downsides of using tennis balls, though:

  • They're really difficult to cut in half;
  • The hair falls off them (especially along the cut) and gets everywhere;
  • They have a second-hand value, so they're cheap rather than free;
  • They're quite bulky.
So I'm not convinced that tennis balls are a good solution.

I also tried cutting bicycle tyre into pieces that fit better on a corner. The previous design for this used three separate strips for each corner; unless constructed very cleverly, it's likely to open up along the diagonal and not protect the corner as well as it could. This new design uses only one piece but stays over the corner better.

The prototype is similar in shape to the sort of sticking plaster that is designed to go on an elbow – for similar reasons. The only downside of it is that it doesn't have the same rotational symmetry that the earlier tyre-based design had. However, I think a final design could be more equilateral in shape.

It would be useful to work out a way to use a template to cut the pieces of tyre accurately and quickly. I doubt that jig saws work on rubber.

Monday, 29 April 2013

Cube X Grows Feet

Machine feet
I've been wondering for a long time how to make the corners of the cube pieces of the giant Soma cube for Nowhere. There needs to be some separation between the faces, so that they don't scrape against each other. There also needs to be some sort of protection of the corners themselves.

I have already built a small test cube for working out things like this, so I have been experimenting on that.

I found a company that sells machine feet and ball corners. The feet work well and even look okay, but at £5 for 12 I'd be looking at £200 worth of feet! Even buying in bulk from China, it looks like £100. Meanwhile, the ball corners looked surprisingly ugly, were slightly too small, and weren't really round enough to stop one cube piece damaging another.

Prototype tyre-based corner
My plan B was to cut up some used car tyres and nail them onto the corners. Yesterday I went looking for tyres. Tyre shops aren't open on Sundays, but I found a stack of moribund tyres outside one and that was enough to realise that they'd be far too big and heavy for this purpose. Then it dawned on me that I should have been thinking about bicycle tyres all along. And, what's more, Get a Grip Bicycle Workshop is open on Sundays. So I walked over there, picked up a bunch of old tyres and spent the afternoon cutting them up. The result is promising.


I can get about 40 strips out of each tyre. I'll need about 500 strips in total. But I've made a jig to help cut the strips, so it should only take 2-3 hours to cut all of them. It'd be even faster if I had some sort of shears or guillotine suitable for cutting rubber.

The strips of each corner can be glued together with rubber cement. Once fabricated, the completed corners can be left unattached where necessary, to permit disassembly and final assembly on site.

Monday, 22 April 2013

The Birth of Cube X

It's been a while (over seven weeks, in fact) since I noted that I'd proposed to build and paint a giant Soma cube for Nowhere. And the reason is: I got a grant for it! So I've been working on realising this thing.

Each piece of the full-size cube is made of three or four small cubes. The pieces need to be affordable, light enough to lift, and yet strong enough for excited people to climb on. They should also be relatively environmentally friendly, and suitable for flat packing for ease of transport. I started researching plywood.

It wasn't easy to find out which wood to use for the faces. Timber merchants sell almost exclusively to builders, who just want cheap wood at known sizes with known structural properties. So, I learned, they generally don't know how much a sheet of any given material weighs, and look at you funny down the phone line when you ask. Three different suppliers gave me three different figures for the density of the same product.

I wanted to build a prototype to see whether my choice of materials would work, before throwing time and money at building the full project. (I had meant to make two prototypes, in fact: one for each of two possible choices of wood for the faces, to see which worked better. That plan was abandoned when I learned that no timber merchant actually stocked the plywood that I suspected would be the better choice – given the lead time they quoted, I'd only be able to make a single order.) Since I'd named the pieces of the Soma cube after letters of the alphabet, the prototype would be called Cube X.

120kg of plywood, in thirds of sheets. Joy
The wood for all the faces arrived one Wednesday, at the same time as a severe migraine. Luckily I'd had the timber merchant cut the sheets into thirds to make them less cumbersome. I lugged 120kg of plywood into the building without being sick, but left it at the foot of the stairwell till I felt better. Later, Mike helped carry it all upstairs.

Each third of a sheet is enough to make six small cube faces, so the prototype would only need one of those thirds. For the frame, I picked up some off-cuts from a Brixton-based burner who answered my ad.

How to McGyver a skill saw onto a vacuum cleaner
On Saturday, I set about cutting. But first I needed something to connect the skill saw exhaust to the vacuum cleaner. Mike suggested fashioning an adapter out of an empty tonic water bottle. I didn't think it would work but, in the absence of better suggestions, gave it a go. Once we'd filed down the thread on the top, it worked amazingly well.

One prototype's worth of wood
Setting up the workbench and some templates for efficient output was interesting and time-consuming. But it won't need to be worked out again. By mid-afternoon, I'd cut all the parts I needed (and learned a lot about how to control the tools along the way).

Next, I made a template to help get screw-holes in the right places quickly and accurately. This is important because the full project needs almost 2000 screws! But other than that, I tried to cut as many corners as possible – I don't want to over-engineer the thing because time is precious, so I wanted to see how little I could get away with.

I had already guessed that it would be sensible to label the insides of all the faces to show how they go together. Doing this means the faces only need to fit together in one way (i.e. they don't need to be interchangeable) which in turn allows me to be a lot less precise about the location of screw holes.

Another thing I learned is that it'll be good to have a scheme for discreetly labeling the outsides of the pieces' faces, to indicate the order in which they should be removed when dismantling them. Arabic numerals are probably best (Roman numerals are useless – they look like accidental marks, and even if circled they look confusingly like 1 and 11). So that means I should use a different sequence to name the faces on the inside.

It probably took me 45 minutes to assemble the complete thing.

So, without further ado, here's Cube X in all its glory. It's 400mm on a side, weighs about 7kg, of which half is the faces and half is the frame. (I'll need the production frame to be a bit lighter.) It has 96 screws in it. It doesn't mind if I jump up and down on it.
Cube X
Next, I need to get hold of more wood for the frame – about 30x30mm should be right. I'll need about 100m of it! Also, I have some Cunning Plans for making bumpers to prevent the pieces from damaging each other. And meanwhile I can carry on producing the faces of all the pieces.